soil types
At the most basic level there are three types of soil: sand, loam and clay. Most soils are a combination...
At the most basic level there are three types of soil: sand, loam and clay. Most soils are a combination...

INGREDIENTS: (1) bowl of black raspberries, (2) pounds of sugar, (3) cups of water, juice from one lemon. Wash the raspberries, drain them well and dry them on a paper towel until all remaining water is completely absorbed. Boil the water and sugar together in a nonstick pot on low heat until the sugar dissolves completely. Turn the heat up and let it boil quickly until it turns to syrup. To check for the right consistency, spill a droplet of syrup on a cold plate. It should look like a little bead and keep its shape. Don’t let the syrup boil for too long, though. When it cools down it will turn too tough to use. Skim the surface foam as it appears until the surface is clean. When the syrup reached the desired consistency, drop the raspberries in it. Do not stir with a spoon; just shake the pot gently to move the fruit around without crushing it. Bring the mixture to a boil and set it aside for 15 minutes, so that the raspberries can release their juice. Skim any additional foam off the surface. Add the liquid from one lemon and stir very gently. Boil the preserves again and try the consistency with the method above until droplets keep their shape. Allow the jam to cool down. Cover the pot with a damp cheese cloth and let the preserves rest till the next day. Fill glass jars to the brim, seal them with parchment paper and/or lids and boil the jars in at least 2 inches of water for 15 minutes. This process will sterilize the contents and seal the jars. Pull the jars out and let them cool down slowly. Enjoy. This recipe is for the real hard core foodies out there; it is an old fashioned fruit preserve that successfully graced my grandparents’ pantry year after year when I was a child. It calls for black raspberries, but it will work with any kind of raspberries or blackberries, or even wild mountain strawberries if you have them. If you never made fruit preserves before, the heavenly fragrance that envelops your home while the fruit and sugar meld their flavors alone is worth the effort. So, put away the fragrant candles and start the pot boiling. You will have a wonderful aroma in your home, a great sweet treat to enjoy, brag about and offer as a gift, and have the satisfaction of creating a product from your garden produce, if you are one of the lucky few whose garden is producing more berries than you can eat. Local craft stores have an infinite supply of raffia, bows, colorful printed wax paper, old fashioned little jars and labels, so you can package this little product beautifully to decorate the open shelves of your kitchen or offer as a gift. If you want to go old school, don’t put lids on the jars: cut a little cardboard circle to fit the top of the jar perfectly and cover with wax paper or colorful plastic wrapping; tie with raffia or brown string. Make sure to tie it very tightly around the jar neck. If any air gets in after the jars are sterilized, the preserves might get moldy.
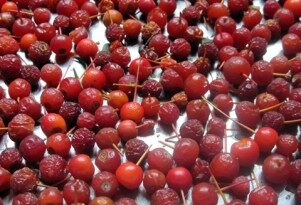
This wonderful little tree is literally weighed down with fruit. Speaking of garden interest for the cold months, these pretty berries will attract many birds through the fall and will create beautiful contrast when set against snow and ice. Crab apple trees are some of the most popular decorative trees, and for good reasons: in spring they put up a stunning display of rose-white flowers with a wonderfully delicate fragrance that lingers on the wind and follows you around, not strong enough to indicate its source, not faint enough to make it possible to ignore. In the fall, the branches are weighed down by these pretty, abundant and very much edible berries. If the birds leave some, please see crab apple jelly recipe below. In winter the remaining berries will look splendid against the white background of snow. If you have an apple tree that is not self-pollinating, a crab apple that blooms at the same time somewhere in its proximity will solve the problem for you. So here goes the Crab apple Jelly recipe: 3-4 pounds of crab apples 3 cups of sugar Put the crab apples into a large pan and cover with water. Bring to a boil and simmer for 10 to 15 minutes. Strain the mixture, add sugar and bring it to a boil again, stirring constantly. Skim the foam off the top and let the jelly thicken until one droplet falling on a plate keeps its shape. Pour into jars and seal with lid. Crab apple jelly has a beautiful bright red color that makes it excellent for adding color to creams, pastries and other deserts.
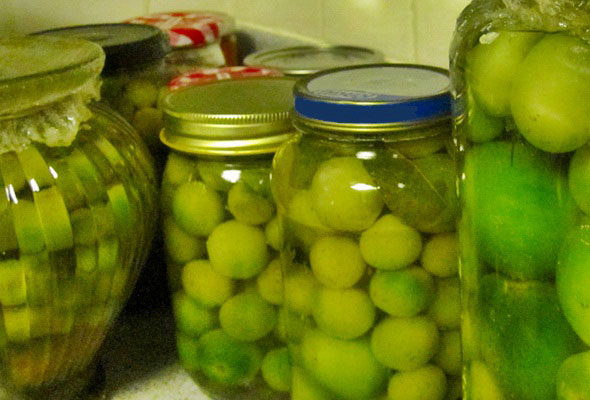
If you live somewhere between zone 4 and zone 6, this would be the time you walk around your garden and acknowledge the fact that the bounty of green tomatoes still hanging from the vines will probably not have time to ripen before the first frost. Grab a bag and gather them all, they make wonderful pickles for the winter months. Here is a quick recipe for pickled green tomatoes, the time it takes to prepare it is roughly how long it takes for the water to boil. Pickled Green Tomatoes You will need clean glass containers (you can be creative about what constitutes a proper pickle jar, please see picture). The only comment is to use sturdier containers because you will have to pour hot liquid in them. However many green tomatoes, bell peppers and hot peppers you found in the garden: arrange artfully to fill the jars. Carrots for decorating – slice lengthwise into 1/4″ thick slices and cut them into interesting shapes. Drop in the jars bay leaves, mixed peppercorns, mustard seed, dried dill, and garlic cloves. If you happen to have a sour cherry tree in your yard (which would be great because they are self pollinating and bear lots of fruit), cut a few tiny branches with leaves and use them to keep the tomatoes from popping up (sour cherry tree leaves prevent pickles from becoming mushy). In a large pot bring two gallons of water, one pound of salt, and a pint of vinegar to a boil. Wrap the pickle jar in a thick wet towel and place it on top of two or three flatware handles. (the wet towel and the metal will help conduct the heat of the boiling liquid so that the glass doesn’t break). Pour the hot water, salt and vinegar mix over the pickles until they are fully covered. Wipe the rims of the jars with a clean towel and cover with card stock rounds and cellophane. Keep in a warm place until the liquid turns clear (the fermenting process should take 4 to 6 weeks), and then store in a cool location to keep over winter. If you are interested in home food preservation, please take a look at this website: National Center for Home Food Preservation Besides information about how to pickle, dry, can or cure basically anything, you will find out the basics of food preserving, the hows and whys, and a lot of other interesting and useful advice.
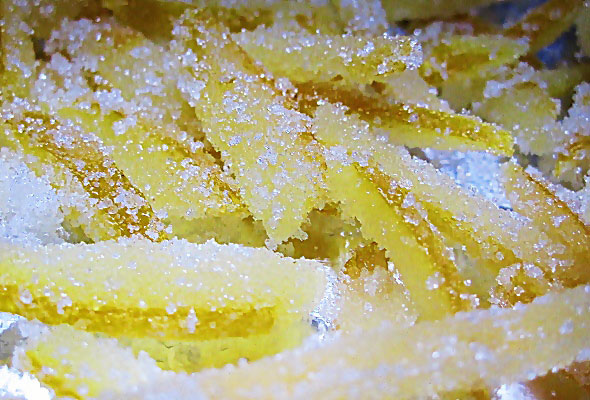
Just in time for the holidays, a recipe for wonderfully fragrant and very festive looking candied lemon peel. Great for decorating, if there is any of it left by the end of the day. Disclaimer – if it looks like candy and tastes like candy it’s because it has the same amount of sugar and calories as candy. That being said… Candied Lemon Peel: – 4 lemons with thick skin – 2 cups of sugar Wash the lemons thoroughly and peel them with a sharp paring knife or a vegetable peeler. Slice the peels into 1/4 inch slices or leave them in their natural shapes. If you like fancier forms, roll the 1/4″ peels into little pinwheels and secure them with toothpicks before cooking. Add the lemon peels and enough cold water to cover them to a pot and bring to a boil. Strain and repeat the process. Strain again and add back to the pot with the sugar and 4 cups of water. The peels should boil in the syrup until they are tender and translucent, about 30 minutes. Strain the candied peels, toss them with granulated sugar until completely coated and spread on aluminum foil for 3 hours to cool and dry. Store in airtight containers. It will last in the refrigerator for up to four weeks.
A while back I mentioned that a very small patch of dirt with good soil, sufficient water and at least eight hours of sunlight a day can produce a surprisingly large yield. Last year I didn't measure the quantity of veggies, so this year I decided to start a little project.
It consists of:
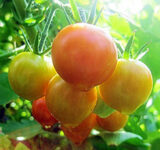
Home Farming Project entry: the yield of approximately 20 square feet of good soil.
The cucurbits are having the year to beat all years!
Check it out here.
Don’t forget to visit our sister website
a beautiful winter garden advice a place of your own aromatherapy beneficial insects bulbs colors and textures faithful shade companions flowers fragrant sachets of dried herbs garden maintenance groundcovers guests in the garden health and beauty herbal home remedies herbs Home preserves medicinal plants moon garden natural balance nature perennials planning pretty veggies propagation rain ramblers and climbers roots and other cuttings roses scents scents, colors and textures seeds seeds, roots and other cuttings slideshow spring Stories summer the art of preserves the daily gardener the micro-farming experiment twiners, ramblers and climbers vegetables wilderness Wildlife woodland natives


